Sunday, August 30, 2009

cookie tags


I make a lot of cookies. Most of my friends are in architecture studio, slaving away until the wee hours of the night. Since I don't have studio and I get lonely, I like making them cookies or doing menial tasks for them (like gluing together a pile of cylinders). Since I make a lot of cookies and I feel bad throwing away all those plastic bags, I have decided to make reusable, washable fabric bags for cookies. Well, I haven't gotten around to that part yet, but I've made the fabric tags to identify the cookie types. I'll get around to making the actual bags later ... eventually ... sometime. I'm busy!
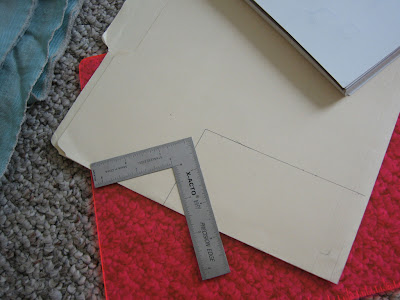
   

First comes the template. I would've just cut out a chunk of fabric and started sewing, but I have finally learned that I am not good at cutting a straight line. I drew a rectangle 2.5" by 6" in the corner of a manila envelope with my trusty metal L ruler. Cut out a chunk from the corner of the template and then went about tracing shapes from the fabric. I have a lot of this cheap fabric because I originally used it to cover the wall partition in my studio. It's the same fabric I used for these.


Cut out all those shapes, and then fold them in half with the wrong sides out. The fabric I used was the same on both sides so it really didn't matter. Sew the two long edges and the short side closed while leaving open the wedge. Then flip it right-side out through the opening that was left. I ironed it at this point to make it easier to work with. I'm not good at drawing a straight line, cutting a straight line, or sewing a straight line. Oh well. Wonky edges make it seem more homemade, right?
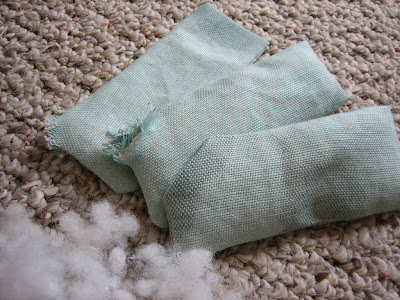


Then comes the stuffing. I just added a bit of stuffing into each tag to give them some thickness and make them a bit more substantial. Batting probably would've worked easier, but I don't have any of that. While embroidering I would have to keep pressing the stuffing to where I wanted it because it moves a bit. Once the letters are embroidered, however, it's pretty much stuck.


To make it easier to attach the tags onto the bags (which I intend to have some sort of drawstring or handle), I decided to sew on some loops. I used a random shoestring that I had and cut it into three-inch strips. By the way, this was a new, clean, completely unused shoestring. Since it was going to be used near food and was meant to be washable, I avoided my usual twine and ribbon. Tucking it into the wedge, which had been folded in, I secured it with a pin, and then took it to the sewing machine. I stitched around the edge of the entire thing, and when it got to the area of the wedge, I stitched that opening closed, making sure to get the ends of the cord as I went.


Then came the final step: embroidering! This was the most fun but also the most time-consuming part. I didn't really plan much before starting the letters, so in some cases I had to go back and redo a letter or two to fix the spacing. This is where a disappearing-ink pen would've come in handy ... if only I had one. Make sure to sew all the way through the tag to cinch in the stuffing. I think it's cute because the reverse side of the tag spells out "oatmeal" but backwards.

I currently have three made: oatmeal, choc chip, and sugar. I plan on making a few more, but I have no idea how I'm going to embroider "peanut butter" onto one of these things. I'll probably also have to make another "choc chip" in case I make a batch of chocolate chip cookies and oatmeal chocolate chip (which would require both an "oatmeal" and "choc chip" tag). I'm running out of the purple embroidery floss I was using, so that is yet another thing to add to my list. On the other hand, my August total is so tiny!

Monday, August 24, 2009

lucky me (part 2)

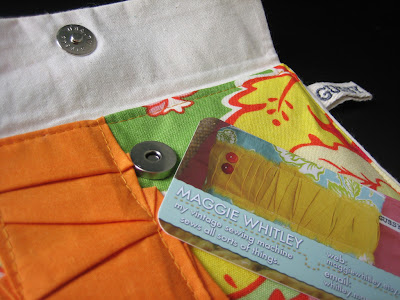
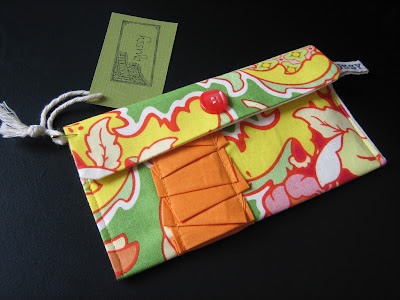
In a previous post I mentioned that I had won two giveaways, and this is the second one! It actually arrived in the mail about a week ago ... but it's been hectic over here! Anyway, it's this beautiful Green Garden Wallet from Maggie Whitley. She has a lovely collection of wallets and pouches at her etsy shop and the giveaway was hosted by Everything Etsy.


Generally the yellow, green, orange color scheme isn't really my cup of tea, but the print is very fun and her signature ruffle gives it character. Now I just have to decide what I'm going to keep in it. I think it'll probably turn into my catchall for coupons and receipts. Hm ... I'll probably have to leave it on my desk and stare at it until I can find a use deserving of it. It also has a magnetic closure, which in my disaster of a purse is a necessary thing.


On a side note, I'm not sure if I like the black background for photographing things. I have two desks in my room, one black and one white. The white one is my designated crafting desk (on top of which my sewing machine sits proudly!) and the black is generally my laptop/schoolwork desk. I like the classiness of black, but I think in general I'll stick to the white ... or the carpet ('cause that's the classiest of all).

School starts in two days. AHHHHHHHHH!!!!!!!!!!!! I don't feel prepared to start classes again. And those eight o'clock classes are going to be the death of me. I haven't really had the chance to get into the back-to-school mindset since I'm waiting until the first week of class to buy books in case my professors change their minds, which happens way too often.

The other day a bunch of us rented a boat out on Lake Austin to celebrate a friend's birthday. It was great fun except for when we had to get rescued by a patrol boat ... yeah, that wasn't so much fun. But otherwise I've pretty much been hanging out at the apartment and sleeping. With my new roommate N, I watched the first three Harry Potter movies and now we're working on the fourth episode of Pride and Prejudice (the six-part BBC series, of course) ... we are really cool like that. This summer has been ridiculously hot, so I prefer staying indoors with air conditioning and Mr. Darcy to melting onto the sidewalk any day.

I also haven't had the chance yet to give X her birthday pillows since she's in the process of moving into her new place right now and I figured I'd wait a bit until her unpacking craziness calmed down a bit. And then I need to make plans to meet up with former roommates K and S.

I don't wanna go back to school!

Friday, August 21, 2009

gifting pillows

I'm back in Austin! Actually, I've been in Austin for a while but I didn't have Internet. But now that I do (after wrestling with Time Warner for forever), I'm going to be better about posting and being productive. I seem to say that a lot.

While I was away one of my friends had a birthday so I wasn't able to make it to her little birthday shindig. So I made her a pair of pillows for her new place. Well, it was partially making her a gift, and partially me teaching myself to use my sewing machine. I'm still not very good at it and none of my lines come out very straight. All in all, I still really like sewing by hand (even though it's time consuming as heck).


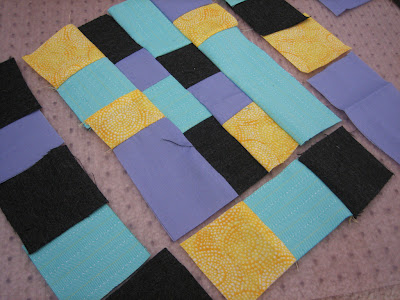
I was planning on making pillows with a nice quilt-y pattern, but I quickly realized that I didn't have enough control to manage that. So I just pieced together some fabric. I sewed it all together, then thought they seemed a bit ... bland. So I added some color around the border.


Then sewed the edge, flipped it inside out, stuffed, blind stitched some of the funky areas, then blind stitched the openings closed. Eh. These took me quite a long time to make, probably just because I'm so darn lazy.

width="400" />

They're not that great, but I'm still learning. Tied a ribbon around them and despite my measuring, they're not exactly the same size. Close, but no. Argh. Well hopefully she'll at least appreciate the thought. School starts in a week, so I'm off to celebrate the last remaining days of summer.

Tuesday, August 11, 2009

lucky me


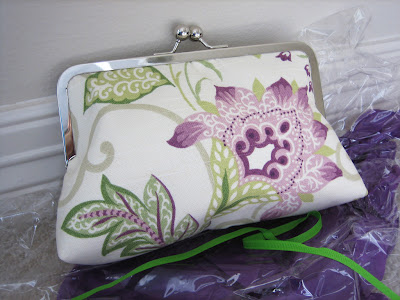
I've won TWO giveaways! I can't believe how lucky I've been. You jealous? The first one was hosted by Dionne at City of Dionne. I just received it in and mail today and could not wait to share it with everyone! I won this beautiful clutch from Amy at IMH Designs. Seriously, check out her Etsy shop - it's full of beautiful clutches. The fabric is fabulous and it is really well crafted, high quality all the way. A big thanks from me to both Dionne and Amy!


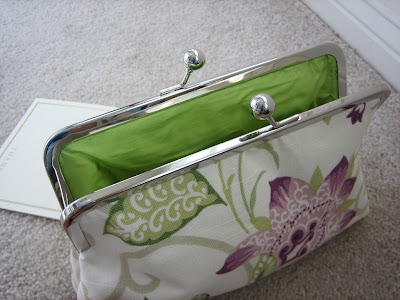
I chose the Lavender and Green Floral Clutch Purse with Dupioni Silk Lining, and it's fantastic! I love the green lining and kisslock clasp. There's a layer of batting in there, making it nice and thick, which will keep things like my camera from harm in case I drop it (I'm clumsy!). I'll let you know about the second giveaway once I receive it (and can gush more thoroughly about it).


Then, I decided to be bad and go shopping. I know, I know ... but I was armed with a coupon for Michael's, and I was in the area, and ... I'm just making excuses for myself. Bad, bad me. I didn't splurge much, just bought some buttons and silver ribbon that had been on my list for a while. And then I found a cute set of lime green measuring scoops that I simply could not pass up. I love Michael's! But I love the blogging community even more!

Tuesday, August 4, 2009

the corner's new layout

I finally have a new layout! Woohoo! The black text on a gray background in the previous layout was annoying me. I whipped up the layout pretty quick in PhotoShop, but then it took me forever to figure out all the little CSS quirks. It's been a few years since I did any HTML-ing, and back in the day I stuck with simple HTML and frames. This look is much more me (and less standard template) so I'm pretty happy with how it came out. I'll probably be working on some quirks for a while, but all in all it's pretty much good.


A few days ago I bought some fabric at the Wal-Mart here because I simply cannot resist cheap fabric. Besides, I needed fabric to craft some pillows. I bought a total of a little under five yards (four yards and one remnant piece). Each yard was either $1.50 or $2.00 so the total was $8.54. Not too bad. Anyway, that marks my last purchase for the month of July, bringing my total for the month to $38.43.

Hm ... what else? Has anyone ever changed a tire before? It is RIDICULOUSLY DIFFICULT! My mother and I were out shopping and when we got back in the car (an SUV), we realized we had a flat, so there we were in the parking lot, trying to change a tire. Ugh. Some guy driving by helped us put the spare on, which was seriously a godsend because neither me nor my mother could lift the tire. So now I know how to change a tire.

About two more weeks at home and then I'm off to my new apartment! I have a new layout and now I'm starting a new tally for the month of August ... yay!

Sunday, August 2, 2009

tutorial: stuffed hedgie


I've been a bit busy hanging out with the family, so I haven't made anything recently. This project is from a little bit ago, but I'm just now getting around to posting it. It's a stuffed hedgehog made from a car-washing mitt that I got at Dollar Tree. I posted a step-by-step here, but by no means did I think of this myself. All credit goes to Darling Petunia and her tutorial here. The only variation was that I embroidered the eyes. So cute! I named him Hedgie ('cause I'm creative like that).


First step was to get the mitt from the dollar store. I had seen the Darling Petunia blog post a while ago when it was featured on Dollar Store Crafts over here. So I had actually been holding onto this mitt since June. Snipped off the wrist and thumb and then pulled out the sewing supplies.


I had looked for black buttons, but sheesh! Buttons are expensive. I ended up just embroidering on eyes just with black floss, just eyeballing their placement (har har ... I'm so punny).


Then came the harder stuff. First up: sewing it up. After the eyes were on, the mitt was flipped inside out and I drew lines, forming a triangle to make its nose. Sewed that shut, leaving the thumb hole open. Once the wrist was sewn into a triangle (and some of the excess material snipped off), it got flipped right-side out and stuffed. Then the thumb hole was blind-stitched closed. Is it called a blind stitch? Like with closing pillows? That's what I've always called it because that's what my mother calls it ... but who knows.


Unfortunately though I had finished the sewing, I wasn't done because it looked a bit funky. The mitten shape was a little weird, asymmetrical because it was meant to fit a hand, so the poor hedgehog was a bit wonky. The square picture shows how it was, with the weird corners, and the second picture shows the hedgehog's underside once I fixed it. I just blind-stitched a bunch around the edge to smooth out all those weird bumps, giving it a nice rounded edge. Then the very last step was to sew on a black pom-pom to serve as his nose, and voila! Hedgie is born.


We had some family friends over today and their little boy V is about two years old. He's such a cutie. Anyway, I had put this hedgehog in the storage room that has all my stuff from school and V, being curious, started rummaging around in there. When he found the hedgehog (although he called it a rat) ... it was so cute! He played with it and this sheep that we had. Absolutely adorable. Also, I'm working on a new blog layout, which I hope to be up within the week. It's been taking a while though because while I know HTML, CSS is a bit new to me.